How to Make Pour-Over Coffee (and Create Magic Right from Your Kitchen)
Taking in the delightful aroma of freshly-brewed coffee is a cherished part of every java drinker’s morning ritual. From the very first inhale to that divine first sip, notes of toasted almonds, caramel, citrus, and bright florals awaken the senses — setting the tone for a peaceful, productive day ahead.
With so many different brewing methods to choose from, it often takes a bit of experimentation to find the one that feels just right. The right method depends on your preferred roast (light, medium, or dark), your grind size, how much control you want over the brewing process, and whether you lean toward a bold, full-bodied cup or a more delicate, nuanced flavor.
If you prefer the latter, the pour-over method invites you to slow down and savor each moment — from the first swirl of water to the final pour. This hands-on brewing style takes a little extra patience and care, but the result is a cup that rewards you with remarkable depth and clarity. Though pour-over coffee may take longer than other methods (only by a few minutes), the flavor payoff is more than worth it.
Read on to learn about why pour-over coffee is such a beloved brewing method, what you’ll need to prepare the perfect cup at home, and a few monk-approved tips for bringing out all the flavors you love most.
Prep Time: About 3–5 minutes
Brew Time: Between 2.5–4 minutes
Total Time: Around 5–9 minutes
Servings: 1 generous cup (or scale ratio as desired)
Stays Fresh for: 4 hours at room temperature; 3–5 days in refrigerator
What Exactly Is Pour-Over Coffee?
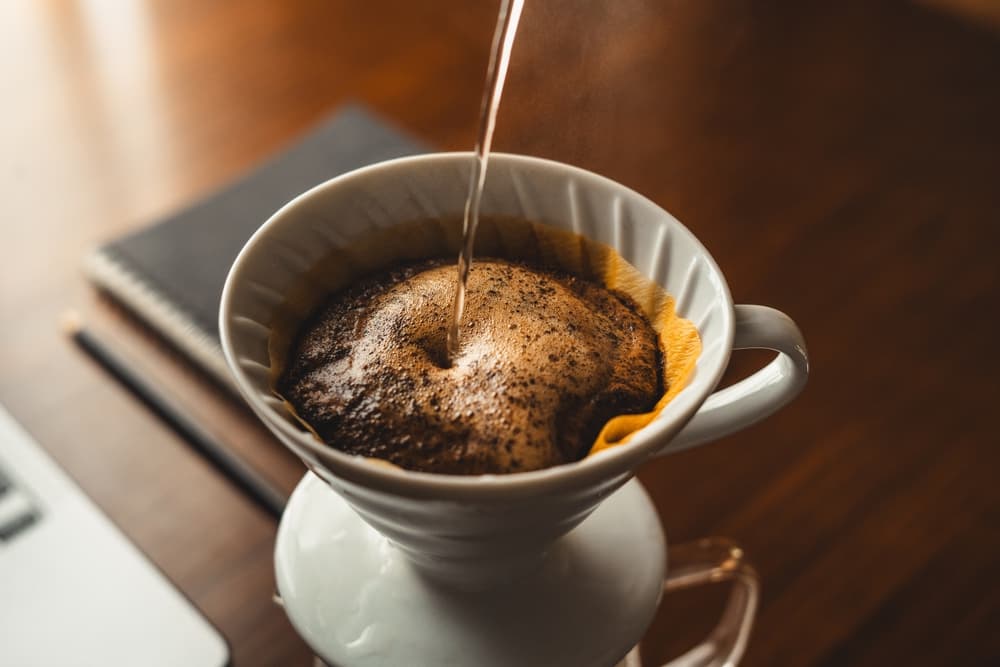
Pour-over coffee is a manual brewing method that celebrates precision and mindfulness. At its simplest, it involves pouring hot water over ground coffee held in a filter, letting gravity pull the water through the grounds to extract flavor, and watching as the freshly brewed coffee drips into your cup (or pitcher) below.
The result? A clean, balanced, and nuanced cup that’s often smoother and brighter than coffee brewed with automatic machines. Because you control every variable, from water temperature to pour speed, pour-over brewing allows you to highlight the delicate notes hidden within your beans, whether citrusy, chocolatey, floral, or nutty. Plus, the filter prevents unwanted grit from entering your finished brew, resulting in a noticeably pleasant taste and mouthfeel.
Historically, this method traces back to early-20th-century Germany, when Melitta Bentz invented the first paper coffee filter in 1908. Frustrated by the bitterness and grit of over-extracted coffee, she sought a much cleaner, gentler brew — and in doing so, inspired the pour-over revolution. Later on, Japanese baristas perfected and popularized the technique, which included the invention of:
- The Hario V60: A cone-shaped dripper with spiral ridges that enhance water flow for better extraction
- The Kalita Wave: Debuted in 2010 as a premier coffee dripper containing a flat bottom with three slits for even saturation
For beginners, mastering pour-over may take a few tries, but that’s part of its charm. It’s a ritual of patience, reflection, and reward, one that our monks appreciate deeply.
Why We Love the Art of Pour Over Brewing
There’s something meditative about brewing coffee this way: the slow spiral of steaming water, the fragrant bloom of freshly ground beans, and the quiet anticipation as the first drops fall into your mug.
At Mystic Monk Coffee, we believe that every cup should reflect the care and craftsmanship poured into it. Pour-over brewing embodies that philosophy. Since it offers total control over the process, you can fine-tune your water temperature, grind size, and pouring technique to create a cup as rich in flavor as it is in meaning.
Automatic drip machines can produce decent coffee, but they can’t replicate the clarity and depth that pour-over delivers. When you brew by hand, you’re not just making coffee, you’re creating a small moment of peace and magic.
What You’ll Need to Prepare the Perfect Cup

What You’ll Need to Prepare the Perfect Cup
The pour-over method may sound a bit fancy or complicated to beginners, but it’s actually quite simple once you have the right tools and ingredients on hand.
Ingredients
- Freshly Roasted Mystic Monk Coffee Beans: Choose your favorite roast from our collection!
- Purified Water: Purity gives you the best-tasting cup possible.
Equipment
- Burr Grinder (Optional): If working with whole bean coffee, you’ll want a medium to coarse grind.
- Pour-over Dripper: Choose from options like a Hario V60, Chemex, or Kalita Wave.
- Paper or Reusable Filter: Separate coffee grounds from your brewed coffee to enhance both taste and texture.
- Kettle: We recommend using one with a gooseneck spout for controlled pouring.
- Digital Scale (Optional): Helpful for accuracy in measuring (and repeating) precise coffee-to-water ratios and refining your technique.
- Carafe or Mug: To hold or store your finished brew.
Want to skip the grinding process and jump straight to the best part? Shop our premium ground coffee selection for everything from floral, fruity flavors and seasonal blends to cocoa and vanilla-infused beans. We employ a universal medium grind in all our ground coffees, so you’ll be well-equipped to start crafting your perfect pour-over brew.
The Best Coffee-to-Water Ratio for the Pour-Over Method
For a balanced cup, most coffee lovers recommend a ratio of 1 gram of coffee to 16 grams (or milliliters) of water. This is often shortened to “1:16” and many home brewers use this as a baseline for a balanced cup. In simpler terms, and if you don’t have a scale on hand, that’s about 2 tablespoons of ground coffee for every 6 ounces of water.
Prefer a stronger, more robust flavor? You can adjust to 1:15 or 1:14. Looking to brew a softer, lighter cup? Try anywhere from 1:17 up to a 1:20 ratio. What matters most is consistency and taking time to notice which balance tastes best to you.
Here’s another helpful guide for fine-tuning further by matching the coffee-to-water ratio to your preferred roast (since they extract flavor at different rates):
- Light roasts: Experiment with a 1:15 to 1:17 ratio to really bring out the sweetness of their fruity, floral notes.
- Medium roasts: A medium roast’s nutty, chocolatey flavor profile may pair well with a 1:14 to 1:15 ratio.
- Dark roasts: Start with a safe ratio between 1:14 or 1:16 and adjust up or down to your liking. Since they’re not typically recommended for pour-over brewing, you’ll have to find the perfect balance to avoid a bitter or burnt taste.
Some commonly recommended tips for brewing a delicious dark roast with the pour-over method include using cooler water (around 185–195 degrees Fahrenheit), a slightly coarser grind (similar to what you’d use with a French Press), and really mastering your technique. You might even try slowly pouring a very small amount of water (less than what’s recommended) before the first “bloom” to maximize the final brew’s sweetness.
Step-by-Step: How to Make Delicious Pour-Over Coffee at Home

Ready to become a full-on barista in your own kitchen? Follow these simple steps to yield a truly flavorful cup every time:
Step 1: Heat the Water
Bring your purified water to about 200°F to 205°F (just below boiling). Too hot, and you risk bitterness; too cool, and your coffee may taste flat. If you accidentally bring the water to a boil, let it sit off the heat for approximately 30–60 seconds before using.
For one 10-oz cup, you’ll need about 10 oz (≈ 300 ml) of water, plus a little extra for rinsing your filter.
Step 2: Measure and Grind Your Coffee Beans
Use 2–3 tablespoons (≈ 10–21 grams) of freshly roasted Mystic Monk Coffee beans for a single serving. Grind them to a medium-coarse consistency, similar to sea salt. Grinding just before brewing preserves the aromatics that make each blend special.
Freshness Tip: If you end up with a surplus of coffee grounds, store them in our Monk Coffee Vault to keep your coffee fresher longer. They’ll be ready for use the next time you brew!
Step 3: Rinse the Filter
Place the filter into your dripper and rinse it with hot water. This warms your dripper and removes any papery taste. Discard the rinse water before brewing.
Step 4: Add Coffee Grounds
Add your ground coffee to the filter and gently shake or tap to level the surface.
Step 5: Pour Once to “Bloom” the Coffee
Start by slowly pouring just enough hot water to saturate the grounds (about twice their weight in water). Let the coffee bloom for 30–45 seconds. You’ll see bubbles form as carbon dioxide escapes, which is a sign of fresh, flavorful beans releasing their hidden character.
Step 6: Continue Pouring in a Circular Motion
After the bloom, continue pouring in slow, steady stages. This helps extract every layer of flavor without overwhelming the grounds.
- First pour: Starting from the center, pour in a gentle spiral until the water level reaches about halfway up the dripper. Let it drain slightly before the next pour.
- Second pour: Continue pouring in slow, even circles, keeping the water level consistent. This maintains steady extraction and allows the flavors to unfold gracefully without any bitterness.
- Final pour: Finish by pouring slightly less water in the center to draw the remaining flavors through the bed of grounds.
The total brew time should take about 2.5 to 4 minutes. You’ll notice the coffee bed lowering evenly — a good sign that your pour was balanced.
Step 7: Serve and Savor
Once the water has fully drained, remove the dripper and take in the fragrance rising from your freshly brewed cup: warm, nutty, and full of life. Gently swirl your carafe, then pour the coffee into your mug. Enjoy it black, or add a dash of sugar, cream, or honey to sweeten up your cup.
Then, take a moment to breathe, reflect, and enjoy that first smooth, satisfying sip.
Pour Over Tips from Our Monks
Our monks have spent years perfecting the art of coffee, and their wisdom applies beautifully to pour-over brewing. Follow these tips for a daily cup of coffee you can look forward to:
- Always use purified water and freshly roasted Mystic Monk beans. Grind right before brewing (if possible) for the fullest flavor.
- Store your beans in a Monk Coffee Vault to keep them fresh for weeks longer.
- Experiment with blends. Light roasts showcase citrus and floral notes, medium roasts evoke nutty and caramel undertones, and dark roasts highlight an even richer chocolate, spice, and caramel flavor.
- Practice the pour. Like prayer or meditation, it’s about rhythm, focus, and presence. The more mindful your movements, the more rewarding your coffee.
A Peaceful Way to Start Your Day: Brew a Flavorful Cup With Mystic Monk Coffee

Pour-over brewing reminds us that good things take time, and that slowing down can bring clarity, joy, and a deeper appreciation for life’s simple pleasures. There’s something deeply satisfying about this brewing ritual: the steady pour of hot water, the rising steam, the first breath of coffee in the air. Each step invites you to pause, be present, and take comfort in the quiet rhythm of morning.
Whether you’re welcoming the day in silence or sharing a fresh batch with someone you love, every pour-over feels like an act of care and intention.
Discover your own moment of calm with Mystic Monk Coffee. From bright, floral light roasts to bold, chocolatey blends, there’s a coffee waiting to make your mornings a little more peaceful, one thoughtful pour at a time.
Read more

If you've ever paused for a quiet moment with a cup of coffee, you've probably noticed something remarkable. Coffee isn't just "coffee," and different cups can offer different flavors. It can be br...

Whether it's beans or grounds, you want to ensure that you keep your coffee as fresh as possible for as long as possible. That way, you preserve every bit of delicious flavor and aroma. To do that,...